Properties of impression materials
When choosing an impression material, attention is paid to its fluidity, ease of processing, working time and dimensional stability.
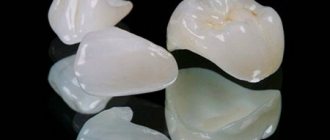
Today, elastomeric polyvinylsiloxane (type A silicones) and polyester impression compounds are used most often in the manufacture of removable and fixed dentures.
Polyvinylsiloxane materials provide simplicity, high dimensional stability and accuracy, excellent elastic recovery after deformation, low distortion, sufficient tensile strength combined with toughness, high fluidity and short setting time. And also the ability to take two-phase impressions.
When choosing an impression material, you often have to make a compromise. The material either has good fluidity or is strong and stable. The VPSbased Honigum material is supposed to combine stability and fluidity.
General overview
Traditionally, the priority option when making impressions was gypsum, which has both advantages and a number of disadvantages. The main disadvantage is that it is difficult to remove from the oral cavity, necessitating additional cleaning of the dentition, as well as checking the conformity of the final form.
An alternative option is materials based on alginate acid, obtained from seaweed. It is characterized by resistance to organic solvents, including water, but the salt elements - magnesium, potassium and sodium alginates - when interacting with H2O, form a viscous texture, excellent for making dental impressions. The chemical impression composition is the following combination:
- Sodium alginate is a hydrogel base, making up about a fifth of the total mass of the material.
- Calcium sulfate dihydrate is the agent responsible for saturating the mixture with calcium ions, which cross-link the molecular chains into a single whole. The share varies in the range of 13-25%.
- Potassium sulfate (10%) is an element that promotes hardening of the impression mass.
- Sodium phosphate (2%) – regulator of the duration of polymerization of the composition.
- Fillers, sodium fluoride, dyes and fragrances.
The material is available in powder, paste and complex form, and is accompanied by instructions for preparing the finished mixture. Among the positive aspects noted by dentists who practice taking alginate impressions are:
- High viscosity coefficient, achieved provided that the solution mixing technology is followed.
- Sufficient accuracy in conveying the features of the relief structure of the prosthetic bed.
- Elasticity, providing the ability to take impressions from undercuts.
- Possibility of storing the composition without loss of quality characteristics for up to three years.
It should be taken into account that alginate is characterized by instability of dimensions, the change of which is caused by a reaction to increased or decreased air humidity in the room. In addition, disinfection of the mass is associated with difficulties, also caused by changes in the dimensions of the finished configuration.
Polyvinylsiloxane testing in the clinic
The patient's main complaint is that the crowns are too large and do not match the color of natural teeth.
Teeth 11 and 21 have zirconium oxide crowns with poor cervical adaptation. The gum is inflamed. The crowns are completely opaque and not adapted to the dental arch.
We removed the crowns. Replaced old composite restorations.
We immediately made two provisional crowns based on the initial situation. Material: Luxatemp composite. The shape of the crowns was changed after fixation, in accordance with the adjacent teeth.
At the very beginning of the work, the color of the final restoration was selected. Before drying teeth.
After the gums healed, it was decided to make a subgingival ledge. Due to the fact that the stump is too bright and will be visible through the thin edge of the crown. The final finishing of the ledges was done using Arkansas stone.
Cervical polishing was performed using a retraction cord to protect the periodontal attachment.
The final aspect of preparation.
After polishing the margins, a second cord was placed to move the marginal gingiva horizontally. The second thread should be completely visible when we look from the cutting edge.
Gap in the gum after removal of the second thread. The space for the impression material is very clearly visible.
For this case, we decided to use Honigum from DMG as the impression material. Lightweight material, very fluid and fills the entire space from under the second cord.
This material is the most fluid I have ever used. Its long working time reduces »kneading stress« to a minimum. And the hardening time in the mouth is noticeably shorter than that of other materials, which is very comfortable for the patient.
Other advantages of this silicone impression material:
- Exceptionally accurate reproduction of details;
- Excellent stability in tray and mouth;
- Balanced hydrophilicity;
- Neutral taste and aroma of honey.
A very good sulcus impression was obtained using a one-step technique.
After taking the impression, the abutment color was selected based on the natural color of the core material (ND).
View of the control model.
Isolation before fixation of two crowns. They were fixed one by one using Variolink Esthetic DC cement from Ivoclar.
In this clinical situation, we decided to use feldspathic ceramics on a refractory matrix.
View of the restoration a month after fixation.
The doctor and patient are very pleased with the result.
Technology for making impressions in 2D format
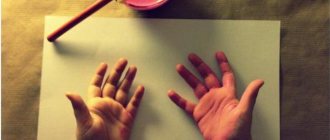
Technology for making impressions in 2D format To make plaster casts in 2D format, a hypoallergenic material is used that produces exact copies of impressions. The completed work will look like this: plaster casts are painted and glued to the photo, the photo is pre-processed with Photoshop and printed. The casts are glued using double-sided tape.
This entire composition is placed in a baguette frame under glass.
The cost of the work depends on the number of impressions ordered.
For example: You made a cast of one arm and leg and designed everything properly, as indicated above, then your work is calculated as follows:
- 1 cast of a handle – 500 RUR (painted)
- 1 cast of a leg – 500 RUR (painted)
- photo processed and printed (21cm*31cm) – 100 rubles (the price includes processing and printing in a photo salon in our city)
- baguette frame (the average cost of frames is from 250 - 350 rubles), but there are frames that are much more expensive, it all depends on the client’s desire and the size of his wallet).
Also, the cost of the frame depends on the distance between the photo and the glass. The shorter the distance, the cheaper the frame. Since our casts are thin and miniature, we can easily place them in a thinner frame. I recommend ordering a framing frame, taking a mold with you, then you will save money, and most importantly, you will be able to calculate everything accurately.
In total, you take your legal 1,500 rubles from the client.
Well, here are your costs:
- impression of a pen (painted) – 20 rubles
- cast of the leg (painted) – 20 rubles
- photo (if in a photo salon) – 100 rubles
- baguette frame (we take the maximum) – 350 rubles
In total, you spend 490 rubles and 20 - 30 minutes of your time. Thus, your net income = 1000 rubles. What are blinds made of?
The casts themselves are made of plaster. But to make it, you first need to make an impression (print). And for the impression, we use impression material that can convey every feature, line of the palm or foot of your child.
That's the whole secret. There are a lot of materials similar to the impression material that we need, for example, dough, plasticine and others like them, but none of them will convey, on plaster, all the subtleties that we need. And only kneadable impression material – group C (CE)-silicone will perform this task flawlessly.
A new question immediately arises: where to buy it?
Answer: at a dental store.
I repeat once again, you need group C silicone (ce). It is used in dentistry (Polysiloxane) to make impressions. The base mass perfectly conveys all the subtleties of the human body. It is safe, odorless, has a soft consistency, very similar to dough.
In our city, such material (C-silicone) costs 1.75 kg = 1200 rubles. This material is reusable. It will be enough to take casts of all the children in your city. When purchasing a material (Basic mass C-silicone), you may be offered to take a hardener for it, but you will refuse because You don't need him.
To make an impression, I come to the customer’s home at a time convenient for him.
We take silicone out of our jar, about a third of it, warm it in our hands,
then add DRY gypsum to it (like flour in dough), because in its pure form the silicone will float and your print will spread in different directions.
Knead to a stiff dough.
We take not a deep, preferably almost flat, but definitely a plastic plate, it bends and it is easier to remove the impression from it later. We lay our silicone dough into a dense flat cake, 1.5 cm thick.
We take the child’s hand and carefully place it on our cake, while straightening the fingers.
If a child grabs the cake, it’s okay, mix it again, or leave it like that and pour it in, it also turns out very interesting, as if in motion.
And that’s it, we put the pen away, see if everything suits us, and go home.
You do all the rest of the work at home.
Now plaster. For the best results, it is advisable to purchase dental plaster (it is super strong), although G6 or G16 sculpture plaster is also excellent for children's impressions. Specifically for children, because their hands are small and their fingers are also small. For the strength of the gypsum, when diluting it, you need to add PVA glue (2 teaspoons). Plaster can be purchased at any hardware store. Take a small container, mix the plaster with water (water + plaster) until the consistency of thick sour cream, not forgetting about PVA glue, and pour it into the impression you made.
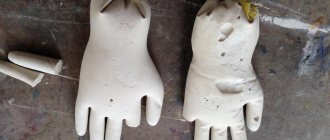
After 2 hours, carefully remove the finished plaster cast
and bring it to mind with a regular knife, because... gypsum is still damp, it is easier to process. Be most careful in the toe area.
Leave for a day until completely dry, if necessary, sand the edges with sandpaper or natfil.
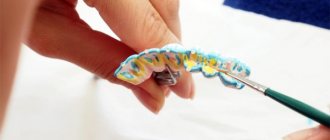
And only then paint with aerosol or acrylic (less effective) paint. I use paint in cans of two popular colors - gold or silver (price no more than 200 rubles). Very economical to use.
IMPORTANT. When you take the finished impression out of the silicone mold, do not rush to crush it and put it away.
Leave it just in case you break or damage the cast during processing. Crumple the used silicone and store in a closed container at room temperature.
YOU MAY NOT BE ABLE TO FIND THE EXACT SAME SILICONE. SO LOOK FOR AN ANALOGUE!!!!
Good luck.
This technology for making impressions in 2D format is entirely owned by Kristina Viktorovna Kotelva.
Curing process
Polymerization of the composition begins immediately after the powder base comes into contact with water, resulting in the formation of a material with an irreversible three-dimensional structure. The impossibility of returning to the original state causes one-time exploitation of the mass. The duration of curing depends on the percentage of free calcium ions, which allows the doctor to independently regulate the intensity of the process. The average cycle time - from mixing the components to removing the structure from the mouth - is no more than 5 minutes.