Patient Victor, 48 years old (veneers on upper and lower teeth)
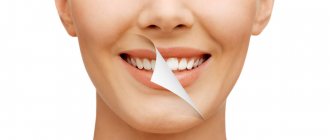
Dental restoration: reviews
Very often, patients are dissatisfied with the way the restoration of the front tooth was performed (in terms of its shape, color and transparency).
Those. First of all, complaints are made specifically about insufficient aesthetics, and often the restored tooth simply looks like a real plastic crown, i.e. artificial and unnatural, standing out against the background of natural dental tissues. Examples of unsuccessful dental restorations: photos
Restoring aesthetics during restoration has 3 key points:
- Tooth shape - in fact, the work of restoring the anatomical shape of a tooth is very similar to the work of a sculptor who sculpts his model, but not from clay, but from filling material. Try to mold a tooth from simple plasticine with all its surfaces, cusps and fissures. I think that you will immediately understand that this requires a certain talent and artistic flair.
- Tooth color – it is necessary to achieve full matching of the shade of the restored tooth with the shades of neighboring teeth.
Filling materials have numerous shades (colors). For example, one factory package of Filtek filling material may contain 20 syringes of the material, each of which will have its own shade. The possibility of layer-by-layer application of a material with one shade onto a material with another shade (i.e., their combination) allows you to ultimately obtain all kinds of color combinations. Unfortunately, most dentists simply do not know how to use all the possibilities of modern filling materials and “play” with colors. The problem is further aggravated by the fact that the color of the tooth in the direction from the cutting edge to the neck of the tooth is always different, it changes, and this also needs to be taken into account. Otherwise, the restored tooth will be completely different from the patient’s neighboring “native” teeth. - Transparency of the tooth - in addition to the fact that the tooth changes its color in the direction from the cutting edge to the neck of the tooth, the transparency of the tooth also changes in exactly the same direction. Therefore, when restoring the cutting edge and cusps, those filling materials are used that, after exposure and curing, will have higher transparency.
October 2021
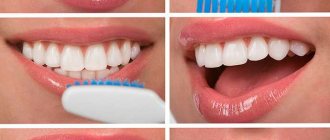
Every person sooner or later is faced with the need for dental treatment and prosthetics . He is sometimes faced with the very difficult question of choosing a method and design from the large number of options that modern dentistry offers. Of course, this choice must be made with the participation of a qualified specialist, but still the patient needs to get a clear idea of what the result will be in a particular case. Photos of teeth before and after the events help to do this in the best possible way.
This section presents the results of the work of our specialists, real cases from clinical practice: photos of the front teeth and their restoration, photos before and after orthodontic treatment , dental prosthetics and others.
They will help you better understand how effective a particular technique is. For example, by looking at a photo of the upper teeth before and after a person had veneers installed on his front teeth, you will be able to appreciate the excellent aesthetic effect achieved. with braces and aligners are amazing . And if you are going to have dental prosthetics, but you don’t know which prosthesis is best, look and choose the most suitable option and discuss the possibility of making it with your dentist.
The modern ARTOX clinic on Yugo-Zapadnaya provides its patients with high-quality dental services using the latest achievements of medical science. Our highly qualified specialists with many years of experience will help you achieve an attractive smile for many years.
Make an appointment with a dentist directly on the website or call: +7,.
Make an appointment
Restoration of anterior teeth using composite filling materials –
In this chapter we will talk about how artistic restoration of the front teeth is carried out using specific examples - 1) in the first video you will see the replacement of an old, darkened restoration of a front tooth with a new one, 2) in the second video the restoration of an extensive chipped front tooth is shown. These videos perfectly demonstrate how artistic aesthetic dental restoration differs from conventional tooth filling.
For example, a special cast is used here to accurately restore the palatal surface of the tooth, as well as a layered restoration technique, which allows, by combining filling materials of different shades, to obtain an aesthetic result that is close to ideal (so that the restored part of the tooth does not differ in color and transparency from the natural tooth tissues). In fact, not all dentists have such skills, and there is no doubt that a certain artistic talent is needed.
Restoration of anterior teeth: video
The main stages of dental restoration:
- Preparation for restoration - at this stage it is necessary to hygienically clean the teeth from plaque and tartar, determine the color of the tooth being restored using a special scale and, in accordance with this, select the colors of the composite filling materials that will be used in the restoration process.
- Local anesthesia (if necessary)
- Drilling out tissues affected by caries - if an old unsatisfactory-looking restoration is being replaced, then the old filling is drilled out.
- Isolating a tooth from saliva - the use of cotton balls is almost universally a thing of history.
Their use does not allow reliably isolating the tooth from saliva, as well as from the patient’s wet breath, which also significantly worsens the quality and reliability of fillings and restorations made of composite filling materials. Now a rubber dam is used for this purpose. It is a latex scarf with holes for the teeth, which is pulled over the teeth. Composite dental restoration performed without reliable isolation from saliva and wet breath may not last long. Firstly, excessive moisture will cause a violation of the marginal seal of the filling to the tooth tissue, which can lead to the appearance of a dark strip or caries at the filling/tooth interface. Secondly, your restoration may simply fall out at one point, because... moisture impairs the adhesion of filling material to tooth tissue. - Fixing the pin in the canal - this stage is carried out if the crown of the tooth is destroyed by more than 1/2 and the tooth is pulpless. In this case, it is necessary to strengthen the filling by installing a pin, otherwise the restoration may fall out under load (24stoma.ru).
- Restoring the shape of a tooth with filling material – to make the tooth look natural, the layered restoration technique is used. In this case, layers of filling material of different shades and different transparency are applied to each other, which together then give the tooth a natural appearance. And this is real art.
- Finishing of the tooth – finishing should be understood as the final modeling of the tooth shape using burs, as well as grinding and polishing of the filling.
Front tooth on the lower jaw
Of course, in the lower part of the jaw there are no maxillary sinuses, and the bone tissue is denser and less susceptible to atrophic processes. But this does not mean that the operation can be treated less carefully. In any case, careful preliminary preparation and testing are required. The speed of recovery and the likelihood of obtaining an excellent result after the period of osseointegration will depend on the qualifications and experience of the doctor.
The trigeminal nerve passes from below; violation of its integrity can lead to serious consequences, the elimination of which will require considerable strength and patience. Such an error can lead to loss of sensitivity in part of the face, impaired blood flow, swelling and other unpleasant symptoms. Installation of supporting elements in this area can be carried out using any protocol: one-stage, classical and one-stage.
The final decision depends on the clinical picture and the period during which the person has been missing a tooth. To select the type of structure, as well as the method of its implantation, the doctor must provide detailed results of a computer and radiographic examination, indicators of a general and biochemical blood test, as well as the conclusion of related specialists, if there are reasons for this.
Cristiano Ronaldo, 33 years old
Ronaldo also had problems with his teeth, but not particularly significant ones, mainly related to his bite. To fix it, the football star was forced to wear braces for a while. It is clearly noticeable that after straightening the teeth, the upper lateral incisor was removed and an implant was installed in place of the missing tooth. The most Ronaldo did with his teeth was in-office whitening.
Demi Moore, 55 years old
Demi Moore could not boast of good teeth in her youth: in early photographs the curvature is clearly visible, the dentition is damaged.
It is even noticeable that in her youth the actress’s front teeth were restored with composite materials. We can safely say that the actress suffered through various periods of her life. The latest photographs clearly show that she was engaged in dental prosthetics: Demi has crowns made of zirconium dioxide. At the same time, the specialist’s work cannot be called ideal: some problems remain unresolved, for example, the bite has not been corrected. But the smile zone is radically different from what it was before.
How much does restoration cost?
The price of the procedure is calculated individually. Clients of the Dentika clinic are offered favorable conditions; it is very popular when the patient is told the total amount, including preparation, cost of materials and the work of a specialist. In this case, there will be no changes, which is quite valuable over a long period of cooperation. It is worth considering that the most inexpensive procedure is a composite restoration; the installation of lumineers is included in the list of the most expensive manipulations.
What are the advantages and disadvantages of aesthetic dental correction?
The advantages are obvious - restoration of the dentition in the absence of individual units, correction of visible defects, beauty of the smile. It is also worth considering that almost all restoration procedures do not cause pain to the patient. Minor discomfort is allowed for people with hypersensitivity. If the issue of time is of fundamental importance, then it is worth choosing restoration with ceramics or composite; it can be carried out in 1-2 procedures, in contrast to installing a crown.
Disadvantages include the lack of treatment. This is a purely cosmetic manipulation, so first basic preparation is required, restoration, if necessary, installation of a pin and extension, and only then, as the final stage, the appearance is corrected. Also, if the patient’s list of habits includes smoking, a passion for coffee and alcohol, and a craving for chewing hard pieces of food, for example, nuts, then the service life of any plate or composite coating will be short-lived.
Methods for restoring chewing teeth. Modified approach
V. V. Shcherbakov , dentist, Royal-Dent aesthetic dentistry clinic (Moscow)
The main goal of restoration of chewing teeth is, first of all, functional rehabilitation. Functionality, in turn, is determined by the anatomical correctness and accuracy of the manufactured structure. The convex and relief chewing surface forms multiple point contacts with antagonist teeth, evenly distributing the occlusal load. The contact points should be small in area, ensuring rapid opening of the teeth during excursion movements.
Wide and flat occlusal surfaces are more likely to remain in contact during mandibular movements. This creates friction, leading to more pronounced wear of teeth and restorations and a decrease in chewing efficiency. Hardly anyone would dispute the need to accurately reproduce chewing morphology when carrying out restoration. However, achieving this goal for the vast majority of doctors is fraught with significant difficulties. One of the most common problems is that the doctor, after painstaking and lengthy modeling of the chewing surface, has to mercilessly cut off all the tubercles and fissures with a bur at the stage of integrating the tooth into the occlusion.
The approaches that will be discussed in this article are designed to greatly facilitate the work of doctors
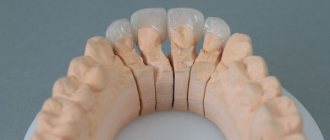
All the beauty that a specialist recreates ultimately turns into a shapeless, unaesthetic and low-functional “cake”. The dental literature describes a large number of various techniques to avoid such difficulties (compass method, orientation to adjacent teeth, occlusal compass, all kinds of schematizations, simplified construction algorithms, etc.). However, all these solutions provide only approximate results. The approaches that will be discussed in this article are designed to greatly facilitate the work of doctors and will allow the production of high-precision restorations. The main idea taken as the basis for this approach is that, depending on the degree of tooth decay, correspondingly different methodological variations of restoration are used. It should, however, be noted that these techniques are focused on working with vital teeth, that is, in conditions favorable for the formation of a strong adhesive connection. According to the degree of destruction, three conditional classes can be distinguished (the classification was developed by the author of the article).
Method of restoring teeth of the 1st class of decay
A typical representative of class 1 is fissure caries, which is quite common. This pathology is very unpredictable, and often the volume of the lesion turns out to be much greater than the expected depth. The fissure form of caries, as a rule, is characterized by almost complete preservation of the chewing morphology, and no matter how high the skill of the restorer, we still will not be able to recreate the chewing surface better than it was. Therefore, it would be quite reasonable to copy the preserved anatomy and transfer it to a future restoration. This can be achieved using the occlusal key technique. The main difference between this approach and the traditional restoration option is that before the preparation, a key (small impression) is removed from the chewing surface, which could subsequently be used to press down a portion of the composite to give it the original tooth shape. The most suitable material for making a key is hard bite silicones for bite registration. They have sufficient hardness to push through the smallest details of the chewing surface, and at the same time practically do not stick to the composite.
Clinical case
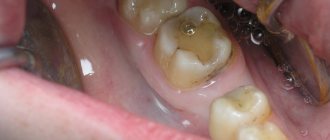
Figure 1 shows the initial situation. Classic fissure caries of teeth 16 and 17. As in most similar cases, the carious process is completely asymptomatic.
Rice. 1
After isolating the working field (Fig. 2) and mechanically removing plaque from the surface of the teeth, the key is removed with bite-silicone, taking into account the dimensions of the clamp (Fig. 3).
Rice. 2
Rice. 3
The appearance of the occlusal key is shown in Figure 4.
Rice. 4
Next, preparation and adhesive preparation are carried out using the XP Bond™ system based on tert-butanol (Fig. 5).
Rice. 5
After restoration and polymerization of the dentinal layer (Ceram•X™ duo+), shades of the base and surface enamel (Esthet•X® HD A2 and AE) with a total thickness of 1.5-2 mm were added one after another, carefully adapted to the surface with approximate contours marked without subsequent curing (Fig. 6).
Rice. 6
Now comes the turn of the occlusal key (Fig. 7).
Rice. 7
To prevent possible gluing, apply a small amount of adhesive to the silicone surface. The key is placed on the tooth and pressed slowly. After the silicone print is in place, you need to slowly remove it with light rocking movements. You should not rush and try to remove the key with one jerk: this will lead to deformation of the composite material. If done correctly, the portion of uncured enamel composite should take the exact shape of the original occlusal surface (Figure 8).
Rice. 8
Excess filling material is easily removed with a brush. If any deformation occurs, the key can be reinstalled. Next, polymerization is carried out for 30-40 seconds, taking into account the thickness of the composite layer (Fig. 9).
Rice. 9
After this, if desired, you can reproduce the characteristics using composite paints. View after finishing and polishing (Fig. 10).
Rice. 10
Occlusal correction is usually minimal or absent. View of the restorations after two days (Fig. 11).
Rice. eleven
It should be noted that an important condition for successful restoration using the occlusal silicone key technique is the use of composite materials that have a sufficiently dense consistency and are capable of retaining the shape transferred by the silicone key. In this regard, a very good option is the Esthet•X® HD composite, which, in addition to excellent chromatic and mechanical characteristics, also has the required degree of density and perfectly holds any shape.
Method of restoring teeth of the 2nd class of decay
Among the clinical cases of this category, deep carious cavities and failed fillings are most common. The main feature of the second class is that with fairly high destruction - up to 50% of the chewing surface - the main outlines of tubercles, ridges, parts of the ridges, etc. are still preserved. Having such landmarks at our disposal, we can easily continue the external contours of the preserved occlusal elements and get a chewing surface very close to the original. For this, the traditional method of layer-by-layer restoration is used, without any changes. The only addition that could help make the restoration more comfortable is the use of modeling tools in a specific sequence.
Algorithm for restoring the chewing surface. Three Tools Concept
Figure 12 shows the initial situation.
Rice. 12
Figures 13-15 show the layer-by-layer introduction of material into the cavity: a layer of dentin, a layer of chromatic enamel (the composite is distributed throughout the cavity without polymerization), a layer of surface enamel.
Rice. 13
Rice. 14
Rice. 15
To adapt the material, it is convenient to use a brush slightly moistened with adhesive (Fig. 16).
Rice. 16
Next, tool No. 1 is used - a large plugger for preliminary marking of all chewing elements (Fig. 17).
Rice. 17
They also outline the lines of future fissures and remove excess material. Modeling continues with tool No. 2 - a small plugger, which reproduces all the main forms, brings out additional ridges, side ridges, secondary recesses, and also emphasizes fissures of the first order (Fig. 18).
Rice. 18
At this stage, the excess composite is finally removed. In some cases, a small brush with lubricant can be used to make anatomical transitions smoother. The last tool (No. 3) is a sharp probe for creating the thinnest elements and emphasizing fissures (Fig. 19).
Rice. 19
After this, polymerization of the composite material is carried out (Fig. 20).
Rice. 20
As a final element, the pigmentation of the fissures can be reproduced with composite paints using a thin endodontic file (Fig. 21-23).
Rice. 21
Rice. 22
Rice. 23
Clinical case
In (Fig. 24) the situation before treatment. An old, failing filling with obvious secondary changes in the surrounding tissue.
Rice. 24
The working field is isolated (Fig. 25) and the carious cavity is prepared (Fig. 26).
Rice. 25
Rice. 26
The quality of treatment is controlled by a caries detector. The deepest areas of the cavity were also stained, but in this case it was not the demineralized tissue that was stained, but the tertiary reaction dentin. Due to the fact that this type of dentin is formed compensatory in response to the action of irritants and is not structurally complete, has cellular inclusions and voids, it is also susceptible to indication by a caries detector. This dentinal bridge is usually the last stable barrier to the pulp chamber and should not be removed. Next, the cavity is sandblasted (Fig. 27) and adhesively prepared with the 5th generation XP Bond™ system (Fig. 28).
Rice. 27
Rice. 28
After thoroughly drying the adhesive before polymerizing it, a very thin layer of low modulus SDR™ composite was applied to the dentin and then co-polymerized. The purpose of this technique is to stabilize the hybrid zone, as well as to prevent the formation of an oxygen-inhibited layer in the adhesive interface.
Part of the cavity is filled with SDR™ composite (Fig. 29).
Rice. 29
It has a high ability to self-adapt, very low polymerization stress and optical characteristics similar to dentin. A portion of Ceram•X™ duo+ D3 composite is applied on top of the SDR™ material to imitate dentin (Fig. 30), then a layer of Esthet•X® HD YE surface enamel (Fig. 32) and a layer of Esthet•X® HD A3 chromatic enamel (Fig. 31).
Rice. thirty
Rice. 31
Rice. 32
The composite spreads over the surface, but does not polymerize. Figure 33 is a view after an instrumental simulation carried out in strict accordance with the three-instrument concept described above.
Rice. 33
Next, the characteristics were reproduced (Fig. 34, 35).
Rice. 34
Rice. 35
Figures 36, 37 show the view after occlusal integration, finishing and polishing.
Rice. 36
Rice. 37
It should, however, be remembered that in order to successfully perform a restoration using the traditional technique, the doctor certainly needs to have some experience and developed skills in anatomical modeling. The most effective way to learn to accurately reproduce the chewing surface is constant practical training.
You need to draw teeth, sculpt them from plasticine, grind them from plaster, model them from wax, reproduce them in the mouth with a composite, etc. All this must be done, guided by the general principles of shaping and knowledge of the myotopography of anatomical elements. Gradually, a sense of form will develop, the ability to “read” characteristic anatomical details, some dependencies will be revealed, and in the end a complete understanding of the entire process of reconstruction of the occlusal surface will come.
Method of restoring teeth of the 3rd class of decay
This category of defects includes large-scale carious lesions, voluminous old fillings, uncomplicated chips of tubercles, walls and any other pathologies characterized by a large deficiency of hard tissues. Such teeth are on the border of indications for direct methods of restoration, and in cases where the destruction of the crown reaches a level of more than 50% of the volume, indirect restorative structures such as composite or ceramic inlays, overlays or crowns are indicated. The biggest challenge in reproducing occlusal morphology in clinical cases in this category is the lack of sufficient landmarks. Under such conditions, we cannot find the required shape and determine the correct spatial position of each anatomical element. In the dental laboratory, such problems are solved with the help of preliminary wax modeling of the teeth in a correctly adjusted articulator. This technique is based on exactly the same principle: before starting tooth restoration, preliminary modeling with a composite is carried out in the mouth directly on top of old fillings and pathologically changed areas. The doctor reproduces the morphology of the tooth as he sees fit, and then checks the occlusal relationship, removing excess with a bur. Thus, all major corrections are carried out at the beginning of work on a preliminary composite model, and not on the finished restoration.
Clinical case
Figure 38 shows the initial situation.
Rice. 38
Deep carious cavity of tooth 26 with significant destruction of the palatodistal, palatomedial cusps, as well as the accessory cusp of Carabelli. The demineralization process, however, is stabilized, the bottom of the cavity is solid, and is practically not stained with a caries detector. Upon completion of the modeling, the necessary occlusal corrections are made (Fig. 40).
Rice. 40
As a result of all articulation tests, a shape is created that can be transferred to the final restoration in the future using a silicone key. Before preparing the cavity, a preliminary composite modeling of the chewing surface is carried out, reproducing all the missing anatomical elements (Fig. 39).
Rice. 39
The procedure is performed before anesthesia is administered and without a rubber dam. Figure 41 shows the process of removing the key using hard silicone.
Rice. 41
Excess impression material is cut off taking into account the dimensions of the future clamp. The view of the occlusal key is shown in Figure 42, the view after preparation is shown in Figure 43.
Rice. 42
Rice. 43
Next, adhesive preparation of the cavity was carried out with the XP Bond™ system (Fig. 44), and the dentinal layer was reproduced with Ceram•X™ duo+ D3 material (Fig. 45).
Rice. 44
Rice. 45
Then, one after the other, without polymerization, the base and surface layers of enamel (Esthet•X® HD A2 and AE) are added and adapted (Fig. 46).
Rice. 46
Due to the fact that after preliminary modeling we receive only an approximate occlusal blank without anatomical nuances, we will need to finish them with thin instruments on the enamel layer after pressing the composite with a key (Fig. 48).
Rice. 48
This must be done carefully so as not to displace the position of the main masticatory hillocks. If serious deformation of the material has occurred, you can try to press the tooth again with a silicone template. Pressing the uncured composite with a silicone key is shown in Figure 47, the view after clarifying the chewing morphology is in Figure 49.
Rice. 47
Rice. 49
The characteristics are reproduced (Fig. 50).
Rice. 50
Figure 51 shows a view of the restoration after occlusal integration, grinding and polishing, and Figure 52 shows a view after three days.
Rice. 51
Rice. 52
Conclusion
These methodological approaches make it possible to obtain the most accurate results of restorative treatment, even when restoring severely damaged teeth. Optimal composite materials also have significant potential to interact with the presented techniques.
Tom Cruise, 56 years old
In photographs of Tom Cruise at different ages, slight problems with his bite are visible: he moves slightly to the left, which causes a violation of the central axis, while the shape of the teeth remains unchanged. Conclusion: Tom Cruise has never done anything drastic with his teeth. But he watches them very carefully, regularly goes for medical examinations, cleanings and treats them as needed.
Nicolas Cage, 54 years old
In the early photographs of Nicolas Cage, dental problems are noticeable: the bite, color, shape of the teeth, and the smile area in general left much to be desired.
In later photographs, it is noticeable that the Hollywood star, everyone’s favorite “Ghost Rider” and “The Family Man,” had prosthetics, not with veneers, but with crowns. Most likely, Cage and Demi Moore have one dentist between them, since one can feel the same style: prosthetics cannot be called ideal - they tried to change the shape, color, and area of the smile, but the bite, unfortunately, remained the same. The dentition still moves to the left, as before the installation of crowns.
Miley Cyrus, 25 years old
Beloved by schoolchildren around the world, Hannah Montana had a dental pathology at an early age: a low crown part of the dentition, which led to the fact that her gums visually hung over her teeth. At the same time, the teeth themselves were small.
Modern photographs of the singer indicate that she coped with her problems with the help of veneers. The smile area, bite, shape and color of the teeth have changed dramatically for the better, and the gums look raised.
Alternatives to composite restorations –
An alternative to composite filling materials is ceramics, i.e. veneers, crowns, restorative inlays made from ceramics. The price corresponds to the quality, and therefore the cost of ceramic restorations will be significantly higher than composite dental fillings.
- Veneers – if your front tooth is destroyed mainly only on the front side, and the lingual part of the tooth is not very damaged, then in this case the best alternative to restoration would be a ceramic veneer. Precisely from ceramics, because ceramics do not darken at all and do not lose their shine over time. The only drawback of this type of prosthetics is its cost.
- Crowns (metal-ceramics or ceramics) - if your tooth is destroyed by more than 1/2 and especially if it is also depulped, we recommend abandoning restoration in favor of an artificial crown. By the way, restoring a tooth “from the root” costs the same as it costs to restore a tooth with a metal-ceramic crown.
- Inlays - if you need to restore a lateral chewing tooth, then an alternative to restoring a tooth from a composite filling material can be a restorative inlay. In terms of reliability, service life and aesthetics, ceramic inlays are at least 3-4 times superior to restorations. We hope that our article was useful to you!
Sources:
1. Personal experience as a dentist, 2. National Library of Medicine (USA), 3. Harvard Medical School (USA), 4. “Adhesive ceramic restorations” (Manier P.), 5. “Aesthetic dentistry and ceramic restorations ( Tuati B.).
Single-stage implantation
Of course, the most popular technique for correcting the smile area is the immediate installation of implants. In this case, it is allowed to remove a diseased or dilapidated tooth in a planned manner, as well as install a pin with a load on a temporary prosthesis on an urgent basis. In rare cases, the patient has to wait several days after the foreign body is implanted until the crown part of the tooth is attached. In this way, it is possible to maintain the attractiveness of a smile without losing the ability to chew, and also, importantly, without bone atrophy. It is not always possible to follow a one-step treatment protocol, because the condition of the alveolar process may not be satisfactory.
In this case, the doctor will first set a date for bone grafting, after which you will have to wait several months for the results to be consolidated and for the synthetic material to fuse with the bone. Sometimes extensions are carried out simultaneously with screwing in the implant, but for advanced cases this option is not suitable.
After tooth extraction, if the bone is of normal height and density, a metal pin is placed in the resulting socket. The wound on the gum is sutured, an abutment and a temporary prosthesis are attached. After 3-5 months, a permanent structure is made based on the jaw cast.
previous post
Dental implantation in 1 day
next entry
More examples of treatment
Caries under filling Enamel caries Crooked teeth Darkening of tooth enamel
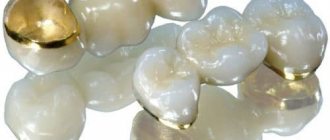
When are half-crowns used and when are veneers used?
All of Angelina’s veneers were of different designs - that is, there were standard veneers, and some veneers were also a module with a root, and the chewing teeth were restored with veneers - half-crowns.
Veneers Half crowns
more details
Tremas and diastemas Deep caries Abrasion of teeth Chips and cracks in teeth Caries under filling Yellow color of teeth
How veneers successfully concealed the consequences of deep caries on teeth
Enamel and dentin, hard and soft tissues of the tooth were affected by caries. But deep caries and rotten teeth are not a problem for veneers! So, let's see.
Veneers Half crowns
more details